
Chanter uses a staff for melee damage and party support. Spinning Strike and Impactful Crush open Dark Crush; Marchutan’s Wrath and Ensnaring Mark add Stigma triggers. Keep Recuperation separate: it heals and removes one debuff before specialization.
Official Chanter class artwork.
Watch the attack animations, movement and weapon style.
Watch on YouTubeRole and reasons to choose it
Choose Chanter for melee attacks, party mantras and decisions between damage and recovery. Unlike Cleric, you spend much of the loop close to the enemy while preserving group support. A damage setup does not supply every healing tool a difficult encounter needs.
With a Cleric, emphasize useful damage and complementary support. Without one, equip healing and shielding before entering as the healer. Read the class comparison if dedicated recovery is the role you prefer.
Active skills and triggers

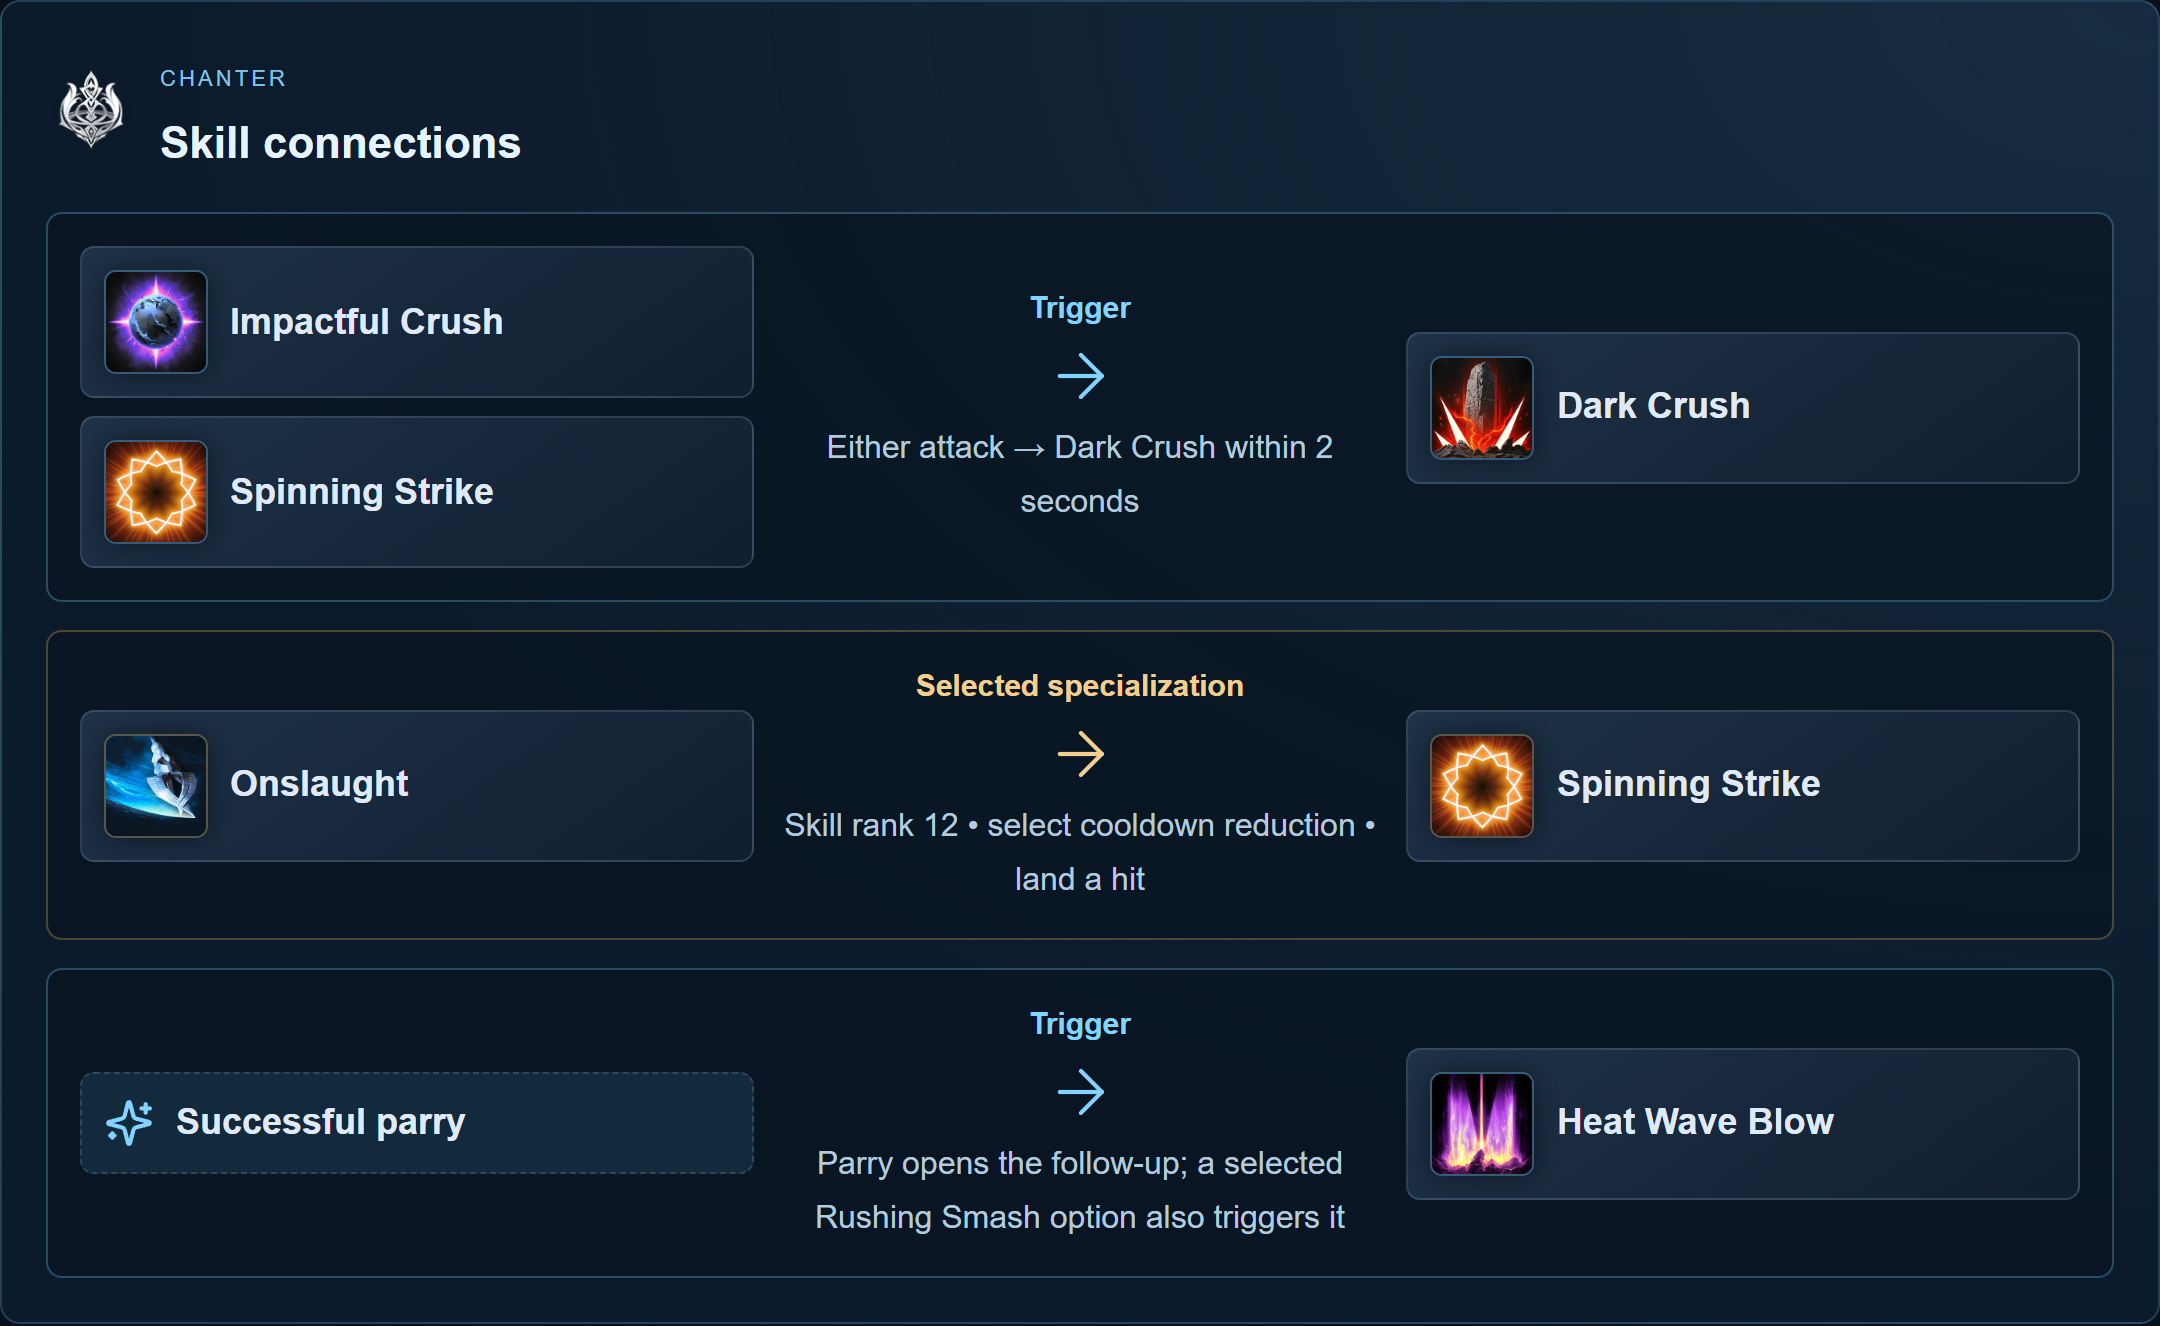
Follow the arrow to see what opens or improves the next skill. Select a skill for its full explanation.
Skill rank 12 • select cooldown reduction • land a hit
Parry opens the follow-up; a selected Rushing Smash option also triggers it
| Skill | Use and trigger |
|---|---|
 Onslaught | Onslaught restores MP. Its rank-12 option shortens Spinning Strike cooldown on hit. |
 Incandescent Blow | Incandescent Blow attacks nearby enemies. Lower MP cost keeps ordinary attacks sustainable. |
 Rushing Smash | Rushing Smash closes distance and restores MP. The on-kill reset helps repeated small pulls. |
 Impactful Crush | Opens Dark Crush for 2s. Use the follow-up within that window before spending another trigger. |
 Dark Crush | Dark Crush is the triggered attack. Wait for its cooldown until the cooldown-removal specialization is selected. |
 Gust Rampage | Gust Rampage requires Stagger. Use it during stagger without losing access to party recovery. |
 Heat Wave Blow | Heat Wave Blow follows Parry, or Rushing Smash with its trigger option. It can seal the enemy. |
 Recuperation | Recuperation heals and removes one debuff, then continues healing over time. More cleansing is a specialization choice. |
 Tremor Crush | Tremor Crush requires Dodge or flight and approaches the target. Keep its movement under manual control. |
 Wave Blow | Wave Blow follows Stun, or a proc against control-immune targets. Use the actual opportunity. |
 Spinning Strike | Grants a critical-damage buff and opens Dark Crush for 2s. Its single-target option suits bosses; its cooldown option creates more trigger windows. |
 Defiance | Removes Stun, Knockdown, Airborne, Grab, Frost and Fear, then grants status immunity for 5s. Cooldown reduction does not affect it; keep this control break manual. |
Early skill and passive priorities
Onslaught supplies MP; its rank-8 recovery option improves sustain and rank 12 shortens Spinning Strike on hit. Rushing Smash's rank-8 on-kill reset helps repeated small pulls, not a boss without kills. Spinning Strike's rank-8 cooldown option improves trigger frequency.
Dark Crush has a rank-8 guaranteed-critical choice, a rank-12 chain and rank-16 cooldown removal. Until the last effect is selected, spread triggers around the actual cooldown. Recuperation already removes one debuff; rank 8 can improve cleansing or uses, while rank 12 adds percentage-HP recovery.
Protection Circle stacks through attacks and grants a party shield at ten stacks. Blessing of Life turns attack into Heal Boost. Attack Preparation improves accuracy and damage. Earth's Promise reduces target tolerance but does not combine with Cleric's Chain of Torment; do not count the same reduction twice.
Choose Stigmas for the encounter
| Choice | Use and condition |
|---|---|
| Undefeated Mantra | Party damage and tolerance. Its damage boost does not stack with Cleric Light of Protection; higher skill level applies, with Mantra winning equal levels. |
| Sprint Mantra | Movement and healing on attacks. Useful utility after the main party role is covered. |
| Marchutan’s Wrath / Ensnaring Mark | Two ranged Dark Crush triggers; each opens a three-second window. Ensnaring Mark also supplies Seal. |
| Impeding Authority / Healing Touch | Party shielding / direct party healing. Replace a damage trigger when recovery is insufficient. |
| Power of the Storm | Temporary party speed and cooldown benefit. Use while the party can attack, not during a forced retreat. |
| Focused Defense / Barrier Spell | Timed personal block / short party HP-floor protection. Certain powerful attacks bypass Barrier Spell. |
Manual opener and combat loop
- Keep equipped mantras active. Approach with Rushing Smash without moving the enemy away from the tank’s position.
- Spinning Strike → available Dark Crush. Before rank-16 cooldown removal, wait for its cooldown before another trigger.
- Impactful Crush → Dark Crush, then an equipped Marchutan’s Wrath or Ensnaring Mark trigger when another follow-up can be used. Fill gaps with Onslaught.
- Use Gust Rampage during Stagger. Interrupt for Recuperation, Healing Touch or shielding when the party needs them; do not put recovery inside the repeated damage chain.
Use one Dark Crush trigger, follow up, and fill the cooldown with ordinary attacks.
- Read the trigger
Check the selected Dark Crush option and the condition that makes the follow-up available.
- Test one opening attack
Use an opening such as Rushing Smash and watch for the follow-up opportunity.
- Use the available follow-up
Use Dark Crush while available, then wait for the next trigger and cooldown.
- Fill the gap and react
Use ordinary attacks while waiting; interrupt the loop for movement, healing, or protection.
Gear and Daevanion decisions
Attack improves both damage and the healing contribution from Blessing of Life. Accuracy keeps Onslaught's cooldown feed and Protection Circle stacks working. Prioritize Spinning Strike and Dark Crush thresholds, then useful damage passives; improve Recuperation or support Stigmas when recovery is the failure.
Keep a damage configuration and a support configuration with their actual Stigma slots. Use builds for skill-rank and point budgets rather than copying a fully developed Daevanion route.
Equipment examples
Compare equipment attributes, then choose items that match your class and level.

Spiritforged Staff
Unique · Staff- Required character level
- 1
- Item level
- 45
- Enhancement limit
- +15
Class: Chanter
Base attributes and enhancement bonus
- Attack
- 183–252
- Accuracy
- 75
- Critical Hit
- 100
- Block
- 125
Item details
Fixed secondary attributes
- Might
- 15
- Critical Hit
- 16
- MP
- 57
- Block
- 23
Magicstone / godstone slots: 4 / 1
Obtained from: Quest

Worn Staff
Common · Staff- Required character level
- 1
- Item level
- 1
- Enhancement limit
- +5
Class: Chanter
Base attributes and enhancement bonus
- Attack
- 4–6
- Accuracy
- 75
- Critical Hit
- 100
- Block
- 125
Item details
Magicstone / godstone slots: 1 / Not provided
More equipment examples (5)
Adjustments and troubleshooting
Dark Crush does not open: use one of its actual triggers and respond within the short window. Several triggers together waste their separate opportunities.
The fast loop stops: rank-16 cooldown removal must be unlocked and selected; earlier ranks need pauses between windows.
Cleansing feels weak: Recuperation removes one effect normally. Select its extra-cleansing option or equip Healing Touch's later cleanse when several removable effects are the problem.
Solo keeps attacks and recovery; parties choose complementary buffs and enough support. For PvP, keep Defiance and manual healing accessible while moving and under pressure.
Complete skill list
Learning a Stigma skill does not add an equipped slot. Upgrades use their respective skill or Stigma points; select specializations separately after unlocking them.
Active skills (12)
| Skill | Character level required |
|---|---|
| Onslaught | 1 |
| Incandescent Blow | 1 |
| Rushing Smash | 1 |
| Impactful Crush | 3 |
| Dark Crush | 4 |
| Gust Rampage | 5 |
| Heat Wave Blow | 7 |
| Recuperation | 8 |
| Tremor Crush | 10 |
| Wave Blow | 12 |
| Spinning Strike | 14 |
| Defiance | 16 |
Passive skills (10)
| Skill | Character level required |
|---|---|
 Blessing of Life | 1 |
 Crossguard | 6 |
 Protection Circle | 9 |
 Inspiring Spell | 11 |
 Attack Preparation | 13 |
 Impact Hit | 15 |
 Raging Spell | 17 |
 Earth's Promise | 21 |
 Survival Willpower | 23 |
 Wind's Promise | 25 |
Stigma skills (13)
| Skill | Character level required |
|---|---|
 Obliterate | 22 |
 Undefeated Mantra | 22 |
 Focused Defense | 22 |
 Sprint Mantra | 22 |
 Fracturing Blow | 22 |
 Marchutan's Wrath | 22 |
 Impeding Authority | 22 |
 Ensnaring Mark | 22 |
 Healing Touch | 22 |
 Power of the Storm | 22 |
 Guardian Blessing | 22 |
 Assault Shock | 22 |
 Barrier Spell | 22 |